No-Oven Boiled Bread – Soft, Easy, and Delicious!
Introduction
What if you could make delicious homemade bread without an oven? This easy no-oven bread recipe is a wonderful solution for anyone who wants fresh, soft, homemade bread using simple pantry ingredients. Made with flour, warm milk, yeast, and oil, the dough is shaped into individual portions and cooked using boiling water before being finished in a covered pan. The result is a unique, satisfying bread with a soft texture and delicious homemade flavor. Perfect for breakfast, lunch, or dinner, this recipe is an exciting alternative to store-bought bread!
Origin
Homemade bread has been prepared in different forms around the world for thousands of years. In regions where ovens were traditionally unavailable or uncommon, cooks developed alternative methods using stovetops, hot stones, steam, and boiling water. This recipe combines yeast-leavened dough with a boiling-water cooking technique, offering a creative twist on traditional homemade bread. Although the exact origin of this particular method is uncertain, it reflects the resourcefulness of home cooks who find ways to prepare bread with basic kitchen equipment.
Cultural Significance
Bread is an important staple in many cultures, representing nourishment, hospitality, and family togetherness. From flatbreads cooked on griddles to steamed breads prepared in covered pots, communities worldwide have developed methods suited to their kitchens and traditions. No-oven bread brings that same spirit of resourcefulness into modern home cooking. It is especially appealing to people who live in homes without ovens or simply want to experiment with an alternative bread-making method.
Ingredients Quantity
For the dough:
- 5 cups all-purpose flour (approximately 600–650 g, depending on how it is measured)
- 2 cups warm milk (480 ml)
- 1 cup vegetable oil (240 ml)
- 1 tablespoon active dry yeast
- 1 tablespoon granulated sugar
- 1 teaspoon salt
For boiling:
- 2½–3 liters water
- 1 teaspoon salt
Additional flour may be needed for kneading and shaping.
Important: These ingredients make a very rich, oily dough. For a lighter everyday bread, you can reduce the oil to ¼–⅓ cup and add a little extra flour if necessary to achieve a workable dough.
Optional Additions
- Sesame seeds: Sprinkle them over the shaped dough for extra flavor.
- Nigella seeds: Add a traditional, aromatic touch.
- Garlic powder: Mix in ½ teaspoon for a savory variation.
- Dried herbs: Add oregano or thyme for a fragrant bread.
- Whole-wheat flour: Replace up to 1 cup of all-purpose flour for a heartier texture.
- Honey: Replace the sugar with 1 tablespoon of honey if desired.
- Grated cheese: Add a small amount of grated cheese for a richer, savory variation.
Tips for Success
- Use warm, not hot, milk: The milk should feel comfortably warm, around 100–110°F (38–43°C), to help activate the yeast without damaging it.
- Check the yeast: If using active dry yeast, allow it to sit in the warm milk with the sugar for 5–10 minutes until foamy.
- Add flour gradually: Flour absorbs liquid differently depending on the brand and measuring method. Add it gradually until the dough becomes soft and manageable.
- Knead thoroughly: Knead for approximately 8–10 minutes to develop the gluten and create a smoother dough.
- Allow enough rising time: Keep the dough covered in a warm place until it roughly doubles in size.
- Shape evenly: Make similarly sized portions so they cook at a similar rate.
- Avoid overcrowding: Cook only a few pieces at a time if necessary.
- Follow a reliable cooking method: Boiling alone generally will not create the familiar crust and crumb of conventional bread. After boiling, the dough needs a suitable finishing method, such as steaming or cooking in a covered skillet, to ensure it is fully cooked.
- Check the center: Cut into a test piece to make sure the inside is fully cooked rather than gummy or doughy.
Instructions
Step 1: Activate the Yeast
Pour the warm milk into a large bowl. Add the sugar and active dry yeast, then stir gently. Let the mixture stand for 5–10 minutes until it becomes slightly foamy.
Step 2: Prepare the Dough
Add the vegetable oil and salt to the yeast mixture. Gradually mix in the flour until a soft dough forms. If the dough is excessively sticky, add a little more flour, one tablespoon at a time.
Step 3: Knead the Dough
Transfer the dough to a lightly floured surface. Knead for 8–10 minutes until smooth and elastic. Place it in a lightly oiled bowl, cover, and leave it in a warm place for approximately 60–90 minutes, or until doubled in size.
Step 4: Shape the Bread
Gently press down the risen dough to release excess air. Divide it into 10–12 equal portions and shape them into small rolls or oval pieces. Cover and allow them to rest for another 10–15 minutes.
Step 5: Prepare the Boiling Water
Bring 2½–3 liters of water to a boil in a large pot and add 1 teaspoon of salt. Reduce the heat slightly so the water maintains a steady simmer.
Step 6: Boil the Dough Portions
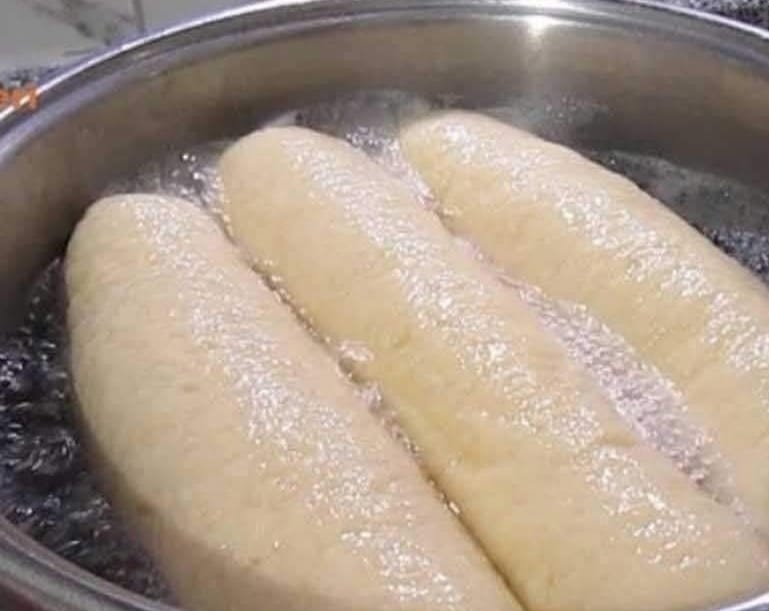
Carefully lower a few dough portions into the simmering water. Cook briefly, turning them as needed, until the outside sets. The exact time depends on their size, and boiling them for too long can make the texture gummy. Remove them with a slotted spoon and allow excess water to drain.
Step 7: Finish Cooking Without an Oven
For a practical no-oven finish, place the boiled dough portions in a lightly oiled, heavy-bottomed skillet. Cover with a lid and cook over low heat, turning occasionally, until the centers are fully cooked and the surfaces are lightly golden.
Work in batches if needed, and keep the heat low enough to prevent the outside from browning before the center cooks. Cooking time will depend on the size and thickness of the portions.
Step 8: Cool and Serve
Transfer the finished bread to a clean plate and allow it to cool slightly before serving. Enjoy it warm with butter, cheese, jam, honey, or your favorite savory dishes.
Description
This no-oven bread offers a creative way to prepare homemade bread when a conventional oven is unavailable. The yeast helps develop a soft, airy texture, while the milk adds richness and the oil contributes tenderness. Boiling sets the outside of the dough, and the covered-skillet finishing step helps cook the center. The result is a distinctive homemade bread that pairs well with both sweet and savory accompaniments.
Nutritional Information
Approximate nutritional values per serving, assuming 12 portions and the original ingredient quantities:
- Calories: 350–430
- Protein: 6–8 g
- Carbohydrates: 40–48 g
- Fat: 18–24 g
- Saturated Fat: 2–4 g
- Fiber: 1–2 g
- Sodium: 250–400 mg
These estimates vary with the flour used, the amount of oil retained in the finished bread, portion size, and the amount of salt absorbed during cooking. Using less oil will substantially reduce the calories and fat per portion.
Conclusion
This no-oven bread recipe is an interesting alternative for anyone who enjoys experimenting with homemade baking. With flour, milk, yeast, and a few everyday ingredients, you can prepare a fresh bread dough without relying on a conventional oven. The boiling and covered-skillet method requires a little care, but it offers a practical way to explore a different bread-making technique.
Recommendation
Serve the bread warm alongside soups, stews, eggs, grilled vegetables, or cheese. For breakfast, enjoy it with butter and honey or your favorite fruit preserves. For a savory snack, pair it with hummus, olives, or a homemade garlic dip.
Store cooled bread in an airtight container and refrigerate it if it contains moisture from the boiling process. Reheat thoroughly before serving. For the best texture, enjoy it fresh on the day it is made.
Embracing Healthful Indulgence
Homemade bread can fit into a balanced diet, especially when served with nutritious accompaniments. To make this recipe lighter, reduce the oil to ¼–⅓ cup, use part whole-wheat flour, and avoid adding excessive salt. Pair a portion with vegetables, beans, eggs, or another source of protein for a more balanced meal.
The joy of homemade bread comes from using simple ingredients and adapting traditional techniques to your kitchen. With a few adjustments, you can enjoy fresh bread while keeping your everyday meals varied and balanced.